"For polishing the silver, are you familiar with the trick of soaking the silver in a basin or pan with a piece of aluminum foil, some baking soda, and salt? Works like a charm!"
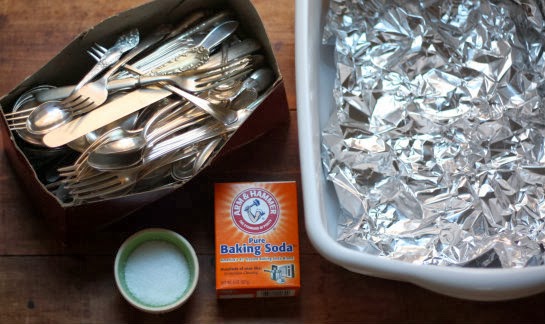
Neither of us had heard of this silver polishing tip before, but we're always up for trying a new home remedy, especially if it saves us time — so we pulled out the supplies and gave it a go after reading into a few more sources online.
Supplies:
Supplies:
- Sink, tub, basin or glass pan
- Hot water
- Baking soda
- Salt
- Aluminum foil
- Tarnished silver
- Kitchen tongs
- Clean dry cloths
Line the bottom of a sink or basin with aluminum foil. It doesn't have to be new foil, this is actually a great way to re-use an old piece up. It also doesn't have to completely cover the base of the container you choose, you'll just want to make sure the pieces you are polishing are able to touch the foil easily.
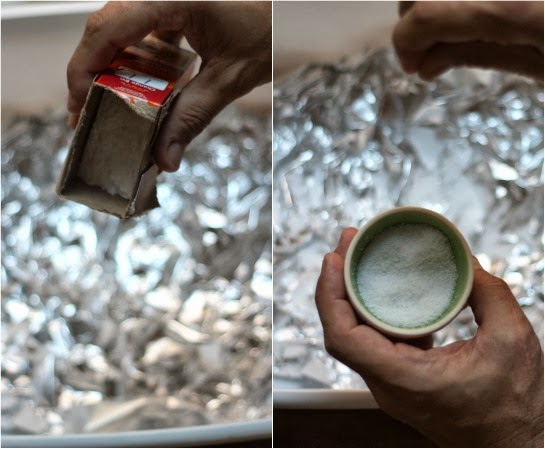
Add salt and baking soda, we roughly poured in equal parts of each — it doesn't have to be an exact measurement but I'd say we used a good 2 tablespoons of each. At this point you should be able to just add hot water to your container and watch the tarnish melt away.
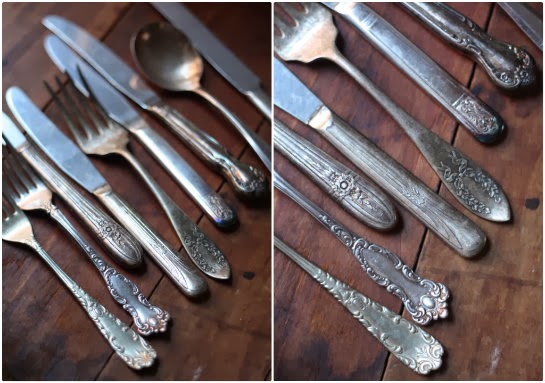
I picked out a small sampling of pieces with heavy tarnish on them for an initial test:
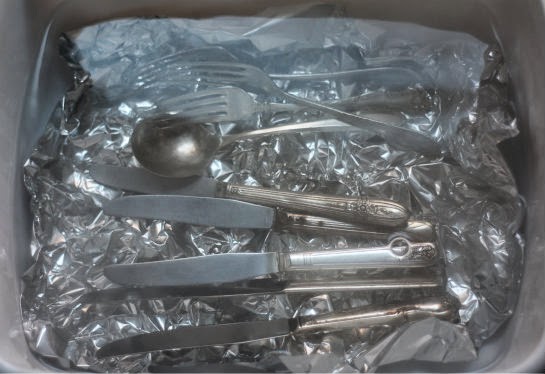
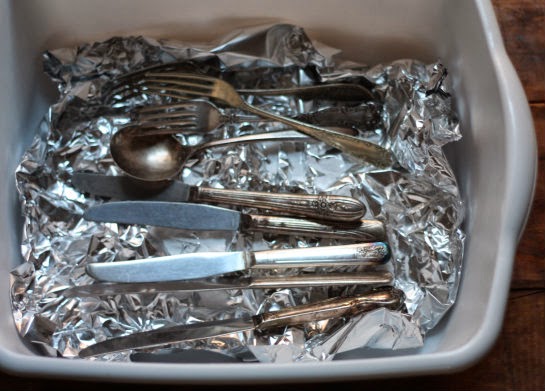
We rested them in the bottom of the basin, making sure all pieces were touching the foil, which seems to be a key in this polishing method:
Then Tim gently poured a pot of boiling water over everything. All the different sources we read said hot water was also a key, even better if you can get it steaming:
As we watched the flatware resting in the water, the tarnish and years of dirt seemed to vanish slowly before our eyes:
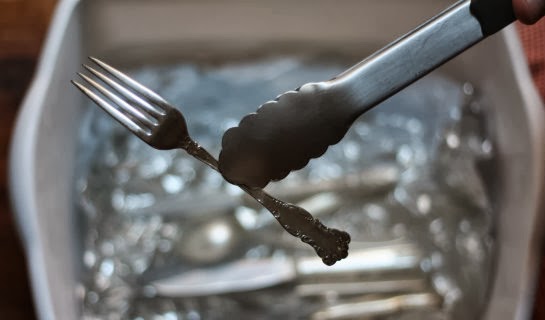
Tip: Since the water and metal were so hot, we used kitchen tongs to flip the flatware over after one side appeared polished and to later transfer the it from the water to a clean cloth.
We let our flatware sit about 5 minutes max — the process was quick. If you have heavily tarnished items, you might want to leave them in a little longer.
After resting all the pieces on the cloth to let them cool, we wiped them down with another clean cloth to see the final results:
This is the set, straight from the liquid bath, with nothing more than a wipe down to clean and dry them:
Here's how they looked before, to save you from the extra scrolling:
Pretty incredible difference, right? We were beyond impressed with how well this trick actually worked. The advantage of using a big liquid bath like this is in how the liquid can reach places a polishing cloth can't, plus you can effectively polish lots of pieces at once while you do other things.
After realizing this little polishing bath wasn't just an urban legend, you better bet I whomped the entire remaining collection on in that tub:

Yes, whomped is a highly technical term.
Look how bright and shiny the silverware looks straight from the baking soda and salt bath:
I'm not sure we've ever seen this flatware so shiny.
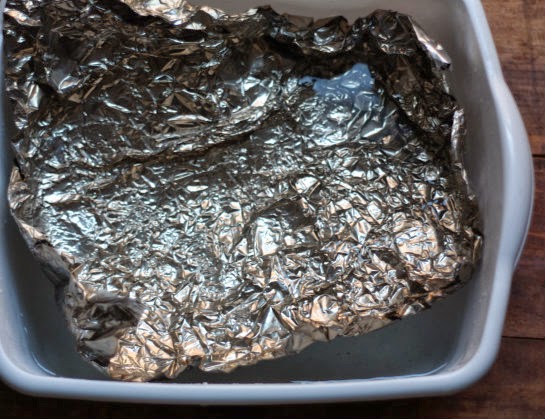
We eventually realized the foil was actually taking on the tarnish from the flatware. See how dark it became:
How crazy is that and how in awe of science are you now? We sure are:
After everything was polished and squeaky clean, we picked up an expandable flatware tray and organized the entire set in one of the drawers of our dining room sideboard:
It feels good to give them a proper place to live and we've even gotten the chance to use different pieces of the set twice now. We're looking forward to using these old friends more often and are forever grateful that we received this anonymous tip in the comments here on the blog!
So tell us — have you ever heard of this trick before or have another silver polishing tip we should know about?
Have a great weekend! We will see you on Monday with our normal Weekend Basics!
P.S. Funny (and true) fact: After hand polishing different pieces of silver we own in the past, Tim once told me, "I could have worked in a castle in England polishing silver." Can't you guys just picture him around this table on Downton Abbey lending a hand?





Yes I have heard of it, but never tried it...and nice to know it really does work...and your silverware looks beautiful :)
ReplyDeleteNow would you happen to know what to use to take stains out of a rubbermaid container ? I have a gallon size container that I use to mix frozen orange juice in and I use it for other things too, have made lemonade, etc. it has discolored from something I made in it and would like to know how to get it out...
Have you heard of STAIN SOLVER ? It is great to make whites brighter, but I used it in this container and it did nothing......so any info you have or any of your bloggers will be greatly appreciated....Thanks
Maybe a mixture of bleach and water and let it sit? Although since you are using it for food make sure you wash it out really good if that does indeed work....Other than that not really sure!
DeleteI just tried it, and it was AWESOME! The tarnish really does just melt away. I've been wanting to polish my silverware in a non-toxic way, but I never remember until I am grabbing a utensil out of the drawer. This looked so easy, that I just did it while I was fixing dinner. Thanks!
ReplyDeleteYay Natalie! Thanks for letting us know of your success!
DeleteWow, what a fabulous idea!
ReplyDeleteHave you seen what it costs to polish silver? What a great tip. This is why I love reading your posts... you just never know what you are going to find!
Cheers!
Barbara Giacometti
Tupelo, MS
Sunday at the Giacomettti
Thank you Barbara for the kind words and for following along in our little world!
DeleteNice silverware! Are those antiques that you've collected?
ReplyDeleteI love little tricks like these for around the house, especially since I'm a chemist by training and can't help myself. I just looked this up, because I understand that the aluminum (Al) reduces (gives electrons to) the silver, but I was under the impression that silver tarnish was an oxide made by reacting with oxygen (Ag2O), very much like iron oxide in rust. BUT google just told me that it's actually silver sulfide, therefore you're actually forming aluminum sulfide at the end, as well as the reduced silver (Ag metal)! Science is awesome.
Carolyn thank you for that science lesson! Wow, I guess we had not thought about the science behind it. Very interesting. Here is the story behind the actual silverware:
Deletehttp://www.17apart.com/2013/09/digging-around-our-set-of-antique-mixed.html
Thanks for stopping by!
Thanks I ended up here because I was wondering about the science behind it. I've actually used this method several times.
DeleteI've been collecting odd pieces of sterling for years. Now that you've removed the tarnish, the best way to keep your silver shining is to use it daily. Rotate the pieces you use. Wash in hot soapy water and dry with a soft cotton t-towel,
ReplyDeleteBarb
Thanks Barb for the tip!
Deletehi i have just read this blog and want to go home and try it right away - one thing I was not completely sure of - does every piece of silver have to be in contact with the tin foil or is it enough to just sit in the bath? In the first photos it looks like each piece it touching in the later photo it looks like you just put everything in together - but earlier you mentioned that you turned each piece over when the tarnish was off one side - sorry for my confusion - I just want to do it properly. Thanks!
ReplyDeleteI have some large pieces that I need to polish I wonder about trying it in a bath tub.
ReplyDeleteI would also like to know that and the clarification from the former post's question, as well.
DeleteWe always stored little used pieces like the hostess pieces wrapped tightly in plastic wrap to prevent air from oxidizing your clean silver. Then we stored these pieces in polar cloth bags until needed.
ReplyDeleteWhen I inherited a couple sets of little used silver plate utensils I decided to enjoy them every day. They put stainless to shame. Silverplate has unique color, warmth and beauty.
I have done this for many years...it works well with washing soda( and no salt has to be added) too. It works well in the bathtub.....use lots of foil to cover the bottom of the tub....just make sure the water is really hot!
DeleteI recently acquired some silver plate pieces that were wrapped in plastic wrap. To anyone thinking of doing this my advice is, DON'T. Most of the pieces are ruined as the plastic wrap has literally changed the shade of the silver in many areas.
DeleteI saw that scene while watching Downton -> recalled an old tvshop ad about the polishing method -> trying to figure out how it works.
ReplyDeleteYou cannot believe how thrilled I am to find this post. A friend asked me to sell some stuff of hers on Ebay, including a silverplated flatware set for 8, and a fancy tea set. She said it was untarnished, in great condition, etc. Not quite the case. So I was anticipating spending this Sunday unwrapping each piece from plastic wrap and then polishing silver with toothpaste and a brush. It really shines everything up quite well, but it's incredibly tedious. But now, I can't wait to use your technique. Thank you.
ReplyDeleteI've been reading up on cleaning and storing silver plate and some of the biggest no-no's from the experts include wrapping it in plastic and cleaning with toothpaste.
DeleteThis comment has been removed by a blog administrator.
ReplyDeleteWho to believe? Many other silver care experts say NEVER to use the aluminum foil method to clean your silver as it will basically ruin it over time.
ReplyDeleteYour silverware looks just gorgeous! I've heard about this way of cleaning, but never tried it. Seeing your post, I remembered it's time to clean my silver again. This time in your way. Thank you for the idea!
ReplyDeleteI'm 60+ and my mother always cleaned her silverware this way ever since I was a little girl... She still uses polish on her bigger trays and serving dishes. The baking soda bath cleaned the detailed designs very well and there was no hesitation about eating from the flatware, as it was cleaned with a natural product. Some 'experts' will say this is not ideal, but any polishing of silver, by any means will technically remove a microscopic layer of silver each cleaning. I only polish a couple of times a year... By the time my silver loses its luster, I won't be around to see it.
ReplyDeleteI have always cleaned my tarnished antique teapots using toothpaste as the hydrated silica helps to take away the stain and discolouration. However, you would need to rub it off quite forcefully. I have a feeling this baking soda and salt solution might help to get the job done easier as it is stronger.
ReplyDeleteHoly guacamole. It worked. My eldest son (42) is expecting his first child in December, and I wanted to give him something truly special. The obvious choice was the 6-piece set of baby silverware we received upon his birth that had been turning nasty colors over the years. Having tried a chemical cleaner on other items, and not being particularly satisfied with the results, or the amount of time and effort needed, I found your site and gave it a try. As stated at the beginning, it worked - beautifully. Thank you for this invaluable information. Makes me want to start collecting all the old tarnished silverware that I pass up at estate and garage sales.
ReplyDeleteGreat idea! I have never added salt. I am going to try it next time! I know that salt is a great cleaner. Adding it in the cleaning recipe of silverware sounds as a fantastic idea. Thank you! Greets!
ReplyDeleteI just tried this...cleaning ny silver necklace and a ring....it really works!
ReplyDeleteThanks for posting this tip.
I just tried this and it didn't work - my silver actually looks worse than when I started :( I followed the steps to the letter (foil, soda/salt, boiling water) - wondering if there was something I missed?
ReplyDeleteAshley Rae Vaughan your post has me hesitating big time!!! I can't afford to damage my family silver plate... Is there any response to her plea?
ReplyDelete